Followers

Saturday 4 December 2010

Marios Texture Artist and UV Mapping

Objects modelled, uv mapped and textured by Marios for Leap of Faith.


needle
Rocking Chair
Shield of Faith
Sword of the Spirit
Owls Pearch

Breastplate of Righteousness

Librarians Chair
Bootles


Test textures for barrel and book....

Friday 3 December 2010

Animatics

Monday 24th January

Group meeting with David Bull.
After showing David the revised animatics with changes made from the last meeting I was so glad that we spent time with him as he gave us some fantastic valuable tips. david was pleased with the animatics. The following tips were suggested.
  1. Climbing down the ladder - To add a bit of hesitation by the foot stretching out to find the next step and to have a shot of the face look of shock as the step snaps from her weight.
  2. Ink pot fall - To add hesitation when the pot falls of the edge as the weight makes it fall.
  3. Shake - Lectern moves as the weight of the librarian slips and grabs hold of the edge.
  4. Quote - To add the quote from the bible at the end of the animatics as it whites out to bring it back to the point.
  5. To relate the ink from the ink pot relative to the doves. The ink pot will have doves carved into the holder. The inkpot will look old and embelished with doves. When the camera moves to the ink pot the ink pot will slightly explode/expand and a shimmer will go round the pot. This is a subtle effect to show the inkpot has some magical powers. Just a seed for the audience to know that the ink pot is special.

This is the revised animatics with more added to the beginning. Please see storyboard link for more information.

Alex Animation

Meeting with Alex Bax to discuss animation. 09.02.2011

After discussing the animation shot by shot....

Hi Depa, here is a transcription of what we were talking about for the shots.
I have made a few extra shots that may look interesting, and may flow a bit better, it will be clearer when i have done some storyboard panels.


Shot 1: Long shot/Full shot/Establishing shot - camera low, close to the runs of the ladder to sell the height. Lectern to look like a thrown show power. Owl is perched on stand on the left hand side of the lectern.
Shot 2: Medium Close up - Zoom in of the owl. not much movement, he can be static, and after 2 seconds blinks and ruffles a bit to show is not stuffed. Camera pans across to the librarian...

Shot 3: Medium lose up - Frontal shot of Lady writing. she is still, hardly any bodily movement. Hand is writing with secondary coming from the quill,
possibly some finger drumming. glasses slip down her nose, she stops them and pushes them further up her nose. Her head moves as she studies. Clock is ticking away in the background and the scene shows a clock close up as she is studying to show time passing...day and night.
Shot 5: Mid - Shot - Front - She yawns.
Shot 6: Mid - Shot - Side view, can see from her right that her spine is curving exaggeratedly. maybe some comical bone cracking noises.
Shot 7: Mid - Shot - looks at her watch
Shot 8: Extreme Close up of watch face to show time.
Shot 4: Extreme Close up - Ariel view She slams the book closed, we see by the cover it is a holy Bible.

Shot 7: Close up - Aerial view she climbs down from the lectern. hand on the side, other hand on the top run of the ladder.

Shot 8: Close up - Foot thumbles around looking for the next run of the ladder (may need to get some live action reference) foot comes down darkening camera.

Shot 9: front of character we see her face through the runs of the ladder, as she tries to steady the wobbling ladder. (ladder may need some rigging) (nice)

Shot 10: Close up - Owl starts looking agitated - faster blinking.

Shot 11: Close up Foot goes through a run of the ladder and she looses her footing!
Shot 12: Long shot Camera looking up - of her suspended Body is suspended in the air as she hangs on the ends of her fingers. Show height.

Shot 12: as she looks down, her glasses fall off and the camera speeds down the extra long ladder to catch them smashing on the ground,
to speed back up to the top. Showing if she falls she wont survive. Not sure if the smashing will occur we can cut the scene before it reaches the fall
Shot 13: Close up - Front view from the lectern at the struggling fingertips. Rocking back and forth rapidly as they try to take the weight. Fingers shuffle along.
Camera shunts along, bringing the ink bottle into view, knocking it off balance. after a comical little pirouette on the spot, the ink bottle falls away in slow motion (like this) The ink bottle will have a magical prescence so when the camera views the inkpot a glimmer of light will just encircle around the glass to show that it is special or magical.
Shot 14: Long Shot from down below as the bottle falls slow at first and covers the camera as it seems to fall through the camera.

Shot 15: Close up - Fingers loose grip one after another.

Shot 16: close up of the librarian eyes - film noir type lighting where the light is a strip across her eyes. show fear...mouth open eyes widening... as the she falls away into darkness.

Shot 17: Woman is silhouetted in the background, as the bottle falls in the foreground.

Shot 18: bottle smash and the contents (ink) spreads out and transforms into a spinning tornado of birds. over too Diogo. Yemi Modelling Doves

i have added some shots here and there Depa the help make sense, and some shots I combined into one.

i'll upload a storyboard as soon as i get it done.

Alex

03/02/2011 - Meeting with Alex to go through animation.

As discussed please see below what is needed for the animation. The shots are heavily governed by extreme camera angles, stretch and anticipation.

Please see below what is needed as discussed last on Thursday.

  • Example animation using moom of a character sitting perched at a table studying with glasses. The pose is detrimental to the age and style of the character. So leaning over with head close to the book studying. I would like the character pondering head moving side to side and maybe pressing twill to her mouth. Secondary animation will occur with the twill. Writing whilst the feather moves. As she is studying her glasses slide down her nose and she moves them back up. She yawns looks at her watch and then stretches as she decides to call it a day.

  • Studying characteristics maybe tapping fingers on the page. Hands or finger pressed on the lips or face as she is thinking...pondering...eyes moving along page...eyebrows move up as she finds an interesting text. She looks over to the ink pot.

As the animation goes...

  1. The camera looks up at the lectern....extreme shot of looking up......A lot of the animation is looking up at or looking down as in order of power. The camera looks up at the lectern as in the animation I showed you then fixed on the owl.
  2. The camera pans closer to the owl (zooms). The owl is in shadow with a beam of light across his eyes. Lit by candle light...As the camera zooms the owl twitches looks side to side generally in a calm state.

  3. Next shot librarian sitting at the lectern studying. Please see above description. Include blinking. and eyebrow moving.

  4. Ariel. Next shot she is looking up at the camera with hand closest to the camera as she is stepping down the ladder. Background blurred She in focus. Close up. She is looking straight at the camera.

  5. She climbs down the ladder

  6. As she climbs down she stretches her foot and thumbles to find the next step. The camera is looking below her so the foot and step almost on top of the camera. She steps down to the next step very carefully as she is old. The ladder wobbles as she climbs down.

  7. Owl is seen again in the shadow..blinks...slightly agitated....

  8. Next shot looking up at the the foot as it reaches the next step it snaps....her weight drops...then she grabs hold to the side of the lectern as she manages to find the next step again. Lots of shake from the fall. As she falls her glasses fall off and falls to the ground...might have the camera pan on the glasses as it falls.

  9. She looks down then the camera pans quickly to the ground and back again to just get the picture of how far the fall is. She looks scared as her body is stretched as shes hanging on for dear life...

  10. Close up her fingers Ariel view as shes holding to the side. she knock the ink pot it wobbles slowly build up anticipation and then suddenly fall in slow motion...her fingers slide off one by one Then she falls....

  11. Looking up you see the bottle falling in slow motion and the librarian falling in the back ground. The bottle comes towards camera getting larger in larger..

Please look at this animation for stuff we discussed and look at storyboard with link I sent

http://www.youtube.com/watch?v=Vq9wivMLzd0

Cheers Alex

Hi Alex

Thanks for the fingers sliding off shelf...

As discussed please can you incorporate in the animation the fingers sliding along the shelf and the index finger knocks into the ink bottle making it fall off the shelf. This causes her to slip of the shelf and fall.

Please can I also have the animation of where she is falling(birds eye view as she slowly falls and she falls into darkness. emphasis on the lighting across the eyes...(film noir style...) please see animatic for further details....

Please can I have it for next week..

This will do for now...

Cheers Alex


First Animation for the hand shot sliding off the shelf....Cool first test. Fingers need to be a little more fluid and as the hand slides along the index finger knocks into the bottle and the bottle falls off the shelf as well as the librarian. need pauses as each finger slides off. Remember that the hands fingers are gripping onto the shelf so the muscles are tight. fingers slide more then fluttering. and fingers move along the shelf. Nice one Alex....Love the index finger snapping back to regain grip looks cool....

Animation test for the fall....


Wednesday 24 November 2010

Modeling The character

I must say I am very pleased with the outcome of this character. I had pretty much envisaged this character last year in April. Did the character come first or the story? I think it was the actual environment, character then the story. I wanted the character to resemble characteristics of myself likewise also the environment....A very hard working, committed, resilient, dedicated and loyal person that even when she feels that her life is dull she still carries on much too her detriment....her normal existence is soon shaken up....

From when I first pitched Leap of faith and being told that it would be better in 2D as most of the feedback given was that they could not see it in 3D has come a long way...this has been a challenging and rewarding experience. I was nervous at first to tackle this character as I knew it would be complicated as the style and design I wanted to meet the original concepts. I am very pleased with the outcome....The character in particular as this is where I want to focus..(character modelling and concepts). If I were to do the character again I would change the topology of the mouth as I do not like the way that it opens...the glasses I wanted more old eccentric mad scientist look. More in the detailing like button hanging off one thread.

I have learnt so much through modelling this character right through to rigging, texturing, Things to look out for when animating.


Finished textures for librarian - April 20th 2011

Rendered shots using ray tracing and Mental ray and final gathering.


Rigged Character by Clymbo


Textures given to Marios for Librarian

I can see the librarian wearing some old brogues...old school footwear...classic...like the double stitching and the worn out textures.

From the first test Marios gave me for the texture of the skin it was to clean and fresh looking. I suggested to have the skin looking like old leather...worn out with character lines and blemishes...
Old style buttons for the cardi. The cardi has three buttons. If we had more time I would have prefer them to be odd and one button hanging from a cotton thread. So when animating secondary animation can occur when she's walking...nice attention to detail...

More wrinkles.........
Old type granny socks over the nee but due too overuse the elasticity of the sock no longer hold s up so the Librarian is seen to be wearing over the knee socks that have slipped creating folds in the fabric...This is something I created in the geometry of the model.
This is more the style of shoe that I envisaged for the librarian. Oxford Brogues.....nice.....

Attention to detail creating the hole effect in the shoe.
Textures I gave to Marios when texturing.


Passed to Clym to Rig.....


modelling belt buckle and belt...

Seperating geommetry by selecting faces and extracting...

Pleats to be well defined and shaped around body.
Adding good old edge loops for sharp edges...


Getting there......working on skirt and belt and belt loop....

Distortions when mirroring now rectified by reducing the threshold.....


Front view
Side view
Top viewThis is where I am smoothing out....its looking like my character.....
Working on glasses...still deciding the style of glasses not sure if I want round or half reading glasses...

Working on hair...She has a bob style hair cut but I just wanted to add some geometry to put in some edges.


Vertices merging together to create triangles in areas.

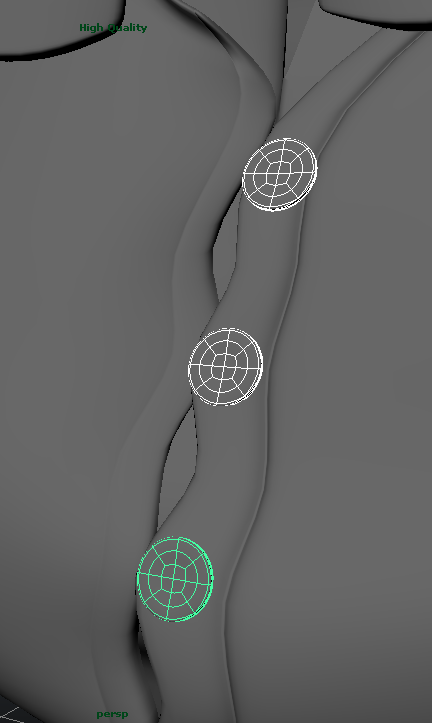
problems with mirroring geometry...some areas triangulate so to get round this I reduced the threshold and it seemed to work....


Sorted it by reversing normals.....


getting the eyebrow to come down over the eye to give a more elderly look...tweeking vertices to get the right look.

Forming the nose

forming the lips...didn't want them to big but slightly pronounced. Small in comparison to the rest of the face.

Started of with small nostrils but later changed to larger nostrils to suit the shape of the nose.

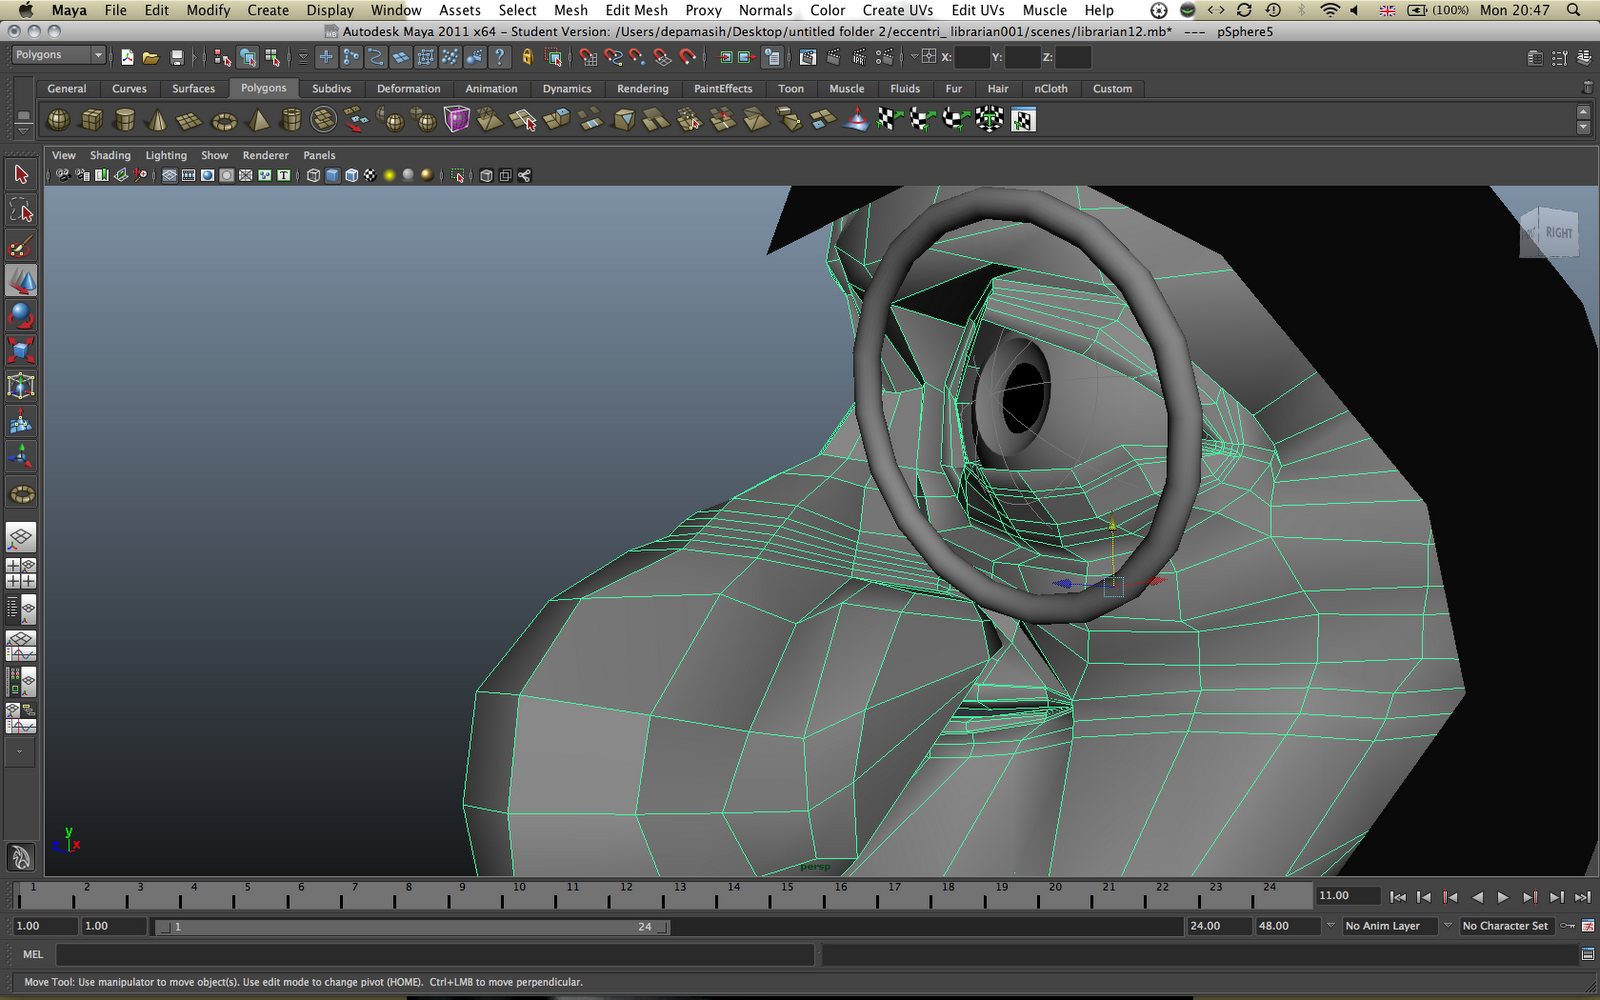
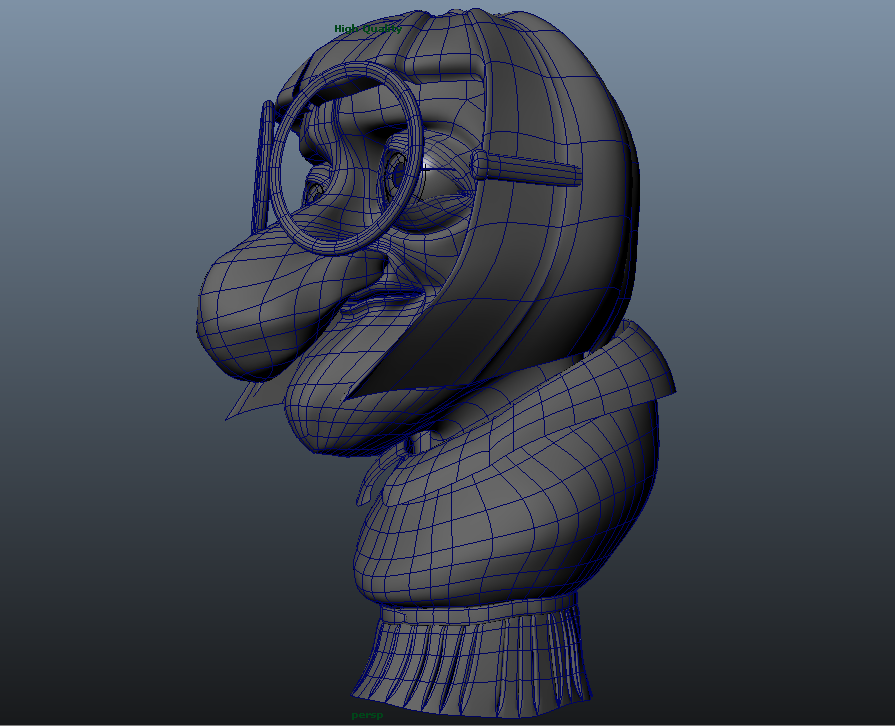
Getting a feel for the kind of nose I want...decided on larger nostrils so merges with rest of nose.Doing the nose although I might ditch the nose and do the mouth first as the nose covers the mouth....dughhhhh!! Main muscle around the eye Obicularis Occuli....the character expression (eye) closed, blink, open wide in shock, look down, look side to side, questioning, tired, scared, stretch...eyelid, eyebrows raised etc....

Wanted heavier lids as the character squints...although for rigging etc I decided to model the character with eyes open.

Getting the eye sorted....

Just getting the eye topology right by using less geometry as possible. Much of the time was spent tweaking the verts etc to get the right look.

Problems....problems....problems....Had one of those crap days where everything you do maya decides it doesn't want to play with you...Tried different methods of modelling this character and decided in the end to ditch the original as I was having probs with the curve tool and I didn't like the way I was going with it. Since this is a stylised character rather then realistic this is heavenly governed by organic shapes so I decided to stick with poly modelling but not originating from a box but rather a sphere I then used the lattice tool to shape the face.
The effect was much closer to the design....Spent a day faffing around as when I smoothed out my model creases were apparent as if it was made from paper...this wasn't right...I then realised that there was a glitch for some bizarre reason when extruding the vertices weren't merging. So when I merged the verts it seemed to smooth out ok. FINALLY....


3D Modelling

Modelling is the process of taking a shape and molding it into a complete 3D mesh. Taking a primitive and extend or grow into the shape that can be refined and detailed from single points (vertex), lines (edge) a curve (spline) to three dimensional objects (faces or polygons).

I will be exploring different techniques in modeling my character...
  1. Spline or patch modeling - A curve bezier curves or nurbs. A cage of splines is created to form a skeleton of the object. The software then creates a patch of polygons that extend between the two splines. forming a 3D skin. Spline modeling is often used in hard objects like cars, buildings, furniture. Not ideal for character modeling.
  2. Box Modeling - Bears closer resemblance to traditional sculpting. Start with a primitive shape and begin adding detail. Downside to this method of modeling I found is that it takes a lot of time tweaking to the final shape You want.
  3. Poly modeling/ edge extrusion - Perhaps the most effective and precise technique. In poly modelling a 3D mesh is created point-by-point, face-by-face. Often starting with one single quad. and extruding the edge of the quad. creating more quads. I have found it is not as quick as box modeling and requires less tweaking. One has to think more of the geometry of the shape and in my case muscle formation. This method is best used for organic modeling.
Outcome: Generally I have tried all methods and for my final character I will be trying all the above methods to suit whatever part of the character.

Difference of shapes....
I watched this fantastic tutorial on how topology can greatly affect the smoothing of a model by Greg Petchkovski. He demonstrates key concepts to avoid unwanted smoothing artifacts.

TOPOLOGY IS SIMPLY THE WIRE FRAME PATTERN OF A POLYGON MESH.

Terminology
  • Subdivision Surface: A popular method of modeling using a low resolution polygon mesh which is then smoothed to produce a well rounded model. Its advantage is to produce high polygon results while only creating a low poly mesh. - Sub Divs
  • Base Mesh - The subdivision model without applying smoothing
  • Smoothing artifacts - Unwanted smoothing problems caused by bad topology
  • In line Edge - An extra line of topology that allows control of corners in subdivision modelling
  • Pole - Where 3, 5 or more edges meet. While 4 meeting edges might be called a 4 sided pole it is rarely refer ed to as one because it is considered normal in sub div on surfaces
Keep exclusively to four sides...3sides produces lumps as well as 5 etc.
Dense meshes are difficult to work with in animating an texturing.
in line edges create smoother edges.
poles - vertex with many edges connected to it. minimise number of poles.
Removing non quads- removing and turning edges..
Reducing unwanted details. - using to many edges can add problems. Bad topology can create problems for rigging..animation and unwrapping etc... During the course of my modeling I will keep in touch with Clym to make sure the topology works with the rigging.

Found this awesome tutorial...gives a good description and shows good topology....Following muscles...
Modelling the character

Resource:
http://www.infinitee-designs.com/Tutorials-Maya-1.htm
http://www.docstoc.com/docs/412347/Maya---Real-Time-Character-Modelling-Tutorial
http://www.thehobbitguy.com/tutorials/polymodeling/page04.htm
http://www.viz.tamu.edu/courses/tutorials/sajan/index.html
http://www.garycmartin.com/mouth_shapes.html
http://www.3dm3.com/tutorials/maya/dobby/

Looking at tutorials head extrusion method


This tutorial inspired me to do this model with a poly plane

For this section my goal is to look at different modelling techniques to model the character
  • edge extrusion method
  • using single polygon to form shape
  • using cylinders
  • curves
  • box modelling

I will be using various tools such as the smooth tool. Looking at muscle formation that will relate to the areas of movement
that my character the librarian will be using.
I will experiment by using nurbs and polys, how to create
creases and refine edges. I will be looking at topology and good edge flow within the mesh.


Looking at the geometry for good edge flow following the muscles - Orbicularis Oculi - eyes, Occipital, Temporal muscles front and top of head, Orbicularis Oris - Mouth, Superior Auricular muscle of the side, = Main muscles please see diagram for a more detailed analysis of the muscles to understand good edge flow.

Eye detail is very important for my character as she is old so heavy ness of the eye muscle sometimes overhanging to display sagging and wrinkles at the corner of the eye using closer edges to define edge.

Blocking out the body....using basic nurb sphere using isoparms and hulls to the acquired shape. Constructing the collar with an opening seam restricted the circle shape to form the collar. When I detached the isoparm that sets the opening for the shirt when
duplicating the isoparm it disconnected parts thus not forming a fluid singular shape. I tried to merge...connect this but it created other deformations when lofting. Toresolve this I just created the basic shape using the Isoparms and lofting it without the detached seam. I took both the body and collar converted it to Polys and cleaned up topology. This took some time but result was successful.

The reason I used nurbs is to achieve a rounded organic shape to add weight on the belly.

As you can see from the above two frames when converting the nubs shape to polys some odd bits of topology occurred. I then went over the modeling and corrected edge flows deleted where not needed and added where needed. Cleaned up the topology so lines flow and quads.

Using basic cylinders to create the geometry.

Following digital tutors and box modeling for face...I used this method previously for my aviator boy character....I found that it takes far to long to get the desired effect by tweaking....Although starting to get the shape I wanted making sure to use clean edge flow.

Using curves to create the shape. I am much happier with the look of this so far so will continue with this wonderful world of using edge lines and curves...

Daft as it may seem when using the curves at first I had problems with seeing the curve shape in a 3D format so I created a basic curved shape and extruded edges to build.